Being able to add smart systems to your home is the plus side of having to rewire the whole house during a home renovation.
We started off by installing a Nest thermostat. The Nest monitors the heat and adjusts it according to when we are home. We can control it with an iPhone app so that it will be nice and warm when we arrive home. As an added bonus, it is better looking than most thermostats. We just missed out on the Nest’s smoke detector, which came out just after we installed the ugly garden variety one from the hardware store.
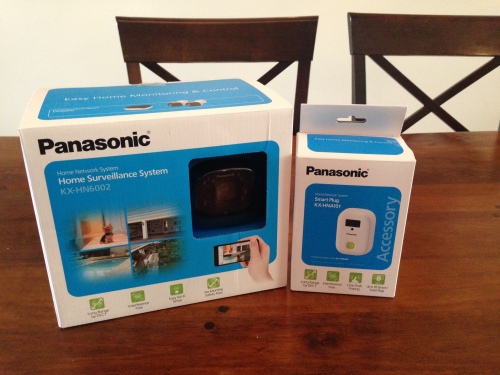
That is about as far as we got until we received the Panasonic DIY Indoor/Outdoor Home Surveillance Camera Kit and the Panasonic Home Network System Smart Plug to try out.
Panasonic DIY Indoor/Outdoor Home Surveillance Camera Kit
We had always planned on having some sort of home surveillance system and even had our electrician run CAT-5 cable to a location on the back of the house for this purpose. Since the front of the house is old brick, we did not want to drill a hole so we thought we would wait until we replaced the front door and install an outlet on the door framing.
As time moved along and we got busy, the security system got pushed down on the list of priorities. We always joked that the most valuable things in our home are those that can’t be carried off anyway like appliances, cabinets and countertops.
It was, therefore, serendipity to receive the Panasonic Home Surveillance Kit because it has an outdoor camera for the backyard and another to monitor the front of the house from indoors (and we can turn it on from our phones to watch what the cats are doing all day–which is what I suspect many systems get used for).
What to know:
- you need a home wifi network
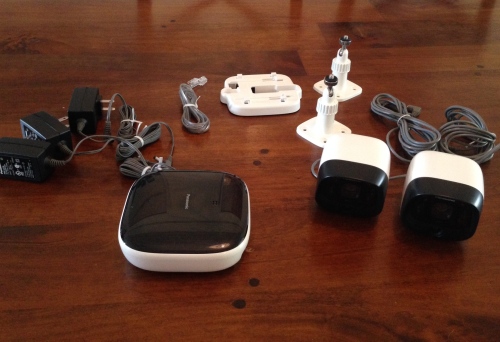
- although the system is wireless between the Hub and the cameras, you do need to plug the Hub into a power outlet
- the cameras also need to connect to a power source
Installation
Step 1 is to connect the Hub to your wifi network. This is pretty straightforward and there are instructions provided. Once this was working we plugged in both cameras and connected our phones to the system to verify that everything was working ok.
These cameras are designed to mount directly against the house and come with mounting screws. In our case, we planned to mount the camera onto an electrical box which our electrician installed. This required some custom work. First, we took a standard outdoor box cover and drilled 4 pilot holes lining up with the 4 holes in the camera’s mounting plate and screwed in the provided screws. The camera was now nice and tight against the cover plate.

Next, we needed to accommodate for the camera’s power cable. To do this, we drilled a hole slightly larger than the cable and filed its edges down to avoid any sharp points that might cut the cable’s insulation. The factory cable comes with a connector, which I was not planning to use so I cut it off and strung the power cable though my new hole and added a dab of silicone to keep the water out.
Next came hard wiring up the camera and installing it on the back of the house. The electrician ran CAT-5 from our basement to this box and CAT-5 can carry a low amperage DC current in the range used by this camera. To hardwire this we simply took 2 of the CAT-5 wires and used crimp connectors to connect them to the 2 wires in the camera’s power cord, which we had previously cut. With this all connected, we mounted the box cover plate to the cover with the watertight gasket (which came with the plate) between the brick and the camera plate.

Next, we connected the camera to its power source. Each of these cameras came with a power transformer, which steps down the line AC current to a low amp DC current. Again, we hard wired the 2 wires we used in the CAT-5 cable to the wires in the camera’s power supply and plugged the system in.
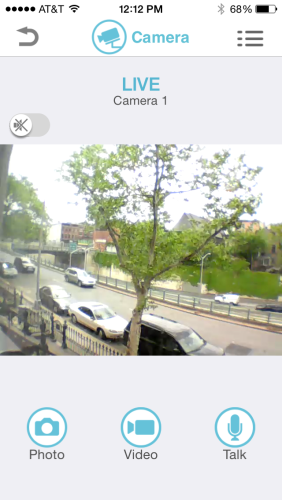
Once the camera powered up it reconnected with the wifi network and using the app we installed earlier we could see the image of our backyard. Using the swivel joint on the back of the camera we adjusted its position so that it captured the deck as well and we set the other camera inside to monitor the front of the house.
The camera has night vision, a microphone and a speaker so if you set one up inside you can yell at your cats to get off of the counter or (just for fun) set it up in your daughter’s room to make sure she is working on her homework and shout out words of encouragement!
Panasonic Home Network System Smart Plug
This device couldn’t be easier to use and replaces the awful dial timer plugs that we usually bust out each holiday season to turn the Christmas tree lights on and off. First, you have to set up the Hub as described above and then open the same Home Network app you downloaded for the home surveillance cameras to:
- set lights and electronics to turn off and on during different times of the day
- one hub allows you to control up to 50 plugs throughout your home
- if you are unexpectedly late you can turn on lights for pets at any time
- great for holiday lights


