
I can’t believe I am using the words “freight train” and “our renovation” in the same sentence. It seems we were waiting for weeks for the structural engineer, architect and contractor to formulate a new plan for the extension to address some structural issues and the next thing we knew the crew was skim coating walls.
How did it happen that one minute we were stymied and the next they needed the plumbing parts stat? We were totally unprepared once again. That is how it is with renovation. We were told the plumbing was going to start and we needed the rough-in parts for the showers and our tub the following week. Panic!
Luckily, we (I) have been doing a lot of Pinterest surfing and we had a board completed for our bathrooms. Since we intended on using the same bathroom tiles and faucet fixtures that we used for the renovation to our condo bathroom a few years ago, we thought easy peasy, right? Wrong. Turns out the tile place we used has since gone out of business, we misplaced the receipts from our previous purchases (so we had no product numbers), and the faucet fixtures we had used were not longer in production. We had two options: pick different tiles and faucets or doggedly search for the old ones. Of course we chose the latter. With love and renovation: when you are told you can’t have something you want it even more, even if it was maybe not that great to begin with.
Thanks to a little invention call the world wide web, we were able to locate our tiles as well as our shower and tub fixtures (albeit on three different sites).
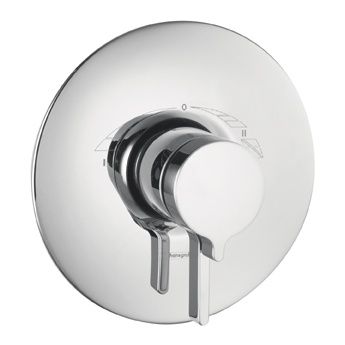
Hansgrohe Metris S Thermobalance III – the little device that caused all the problems. We loved the fact that the temp and water diverter control were all in one unit.
As for the tub, sinks and vanities, it was a bit more research. We had a 5.5 foot tub picked out (a Toto) that, according to the website, could be installed as an alcove or a drop-in. In the photo it looked like a drop-in. We emailed the website to confirm because we need an alcove due to space limitations. Just before we were going to order it we had an attack of doubt. So I emailed Toto who confirmed that this model was a drop-in only. Moral of the story: Do not trust listings on websites. If the picture does not look like what it is supposed to be, then it might not be. Double check with the manufacturer. A few minutes might save you a great deal of hassle.
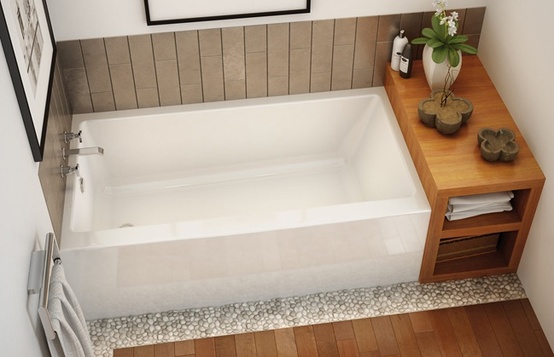
This is the tub we ordered in the end. Although it is acrylic, we like the square modern look.
In the end we found another bathtub that we liked better. We debated the whole acrylic vs. cast iron thing but figured it was more important to like the tub rather than just because it is made with more durable material. Besides, we had no problems with our acrylic tub in our condo. We did not see this tub when we did our initial search so goes to show that if at first you don’t find what you are looking for, keep looking and you will find it eventually.
Next up, sink and vanity cabinet. Our struggle here was finding a double sink that was only 40 inches wide. The initial plans for the house showed the bathroom with two sinks. Next lesson, just because your architect inserts two little sinks in the plan, doesn’t mean they can actually fit in there. All the nice double sinks are in vanities 48 to 60 inches wide. At first we picked out a 60 inch vanity, then adjusted to the reality and picked out a nice 48 inch one only to measure the room ourselves to see that we had to go down even further. My dreams of multiple drawers all to myself when down the drain. As we mentioned before, the size of the bathroom did not initially take into consideration the old fireplace hearth that took a foot and a half of space from our master bath. For those of you looking for a 40 inch vanity with a double sink there are some options including Pottery Barn, Ikea or pricier option like Lacava. We still have not ordered the sink and cabinet but may go with the cheap Ikea cabinet and a higher end sink.
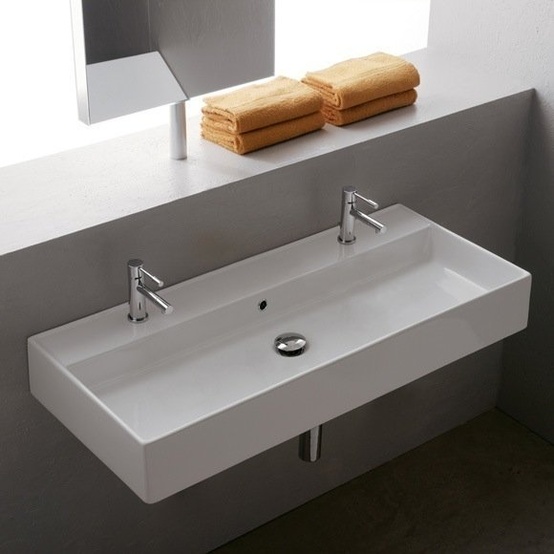
An alternative to separate sinks. We can still both brush our teeth without getting on each other’s nerves.
At the end of the day, the plumber (subcontracted by the contractor) did not show up on the day he was scheduled so our panic was for nothing. Hurry up and wait is what we do.
Next up, what is with all these trades people in the building industry that don’t show up or return sales calls? I guess there must be so much work in the city that they don’t need to follow the business rules of etiquette.

 A fireplace and chimney is made up of several parts including the mantel, the hearth, the firebox and the smoke chamber. Over the years these components can get damaged, wear out or no longer fall within modern code requirements.
 A certain amount of fireplace restoration can be done without a permit from the DOB. However, if you are in the process of doing a renovation then it must be done under the general construction permit. This means that it must go under your contractor’s insurance and therefore your contractor will “manage it” i.e. tack on a 20% fee.


