What to consider when refinishing floors.

We recently visited The Merchant’s House museum and can’t believe we’ve lived in NYC all this time and did not know about this house.  If you are renovating an old row house, we would recommend you see this piece of history.  It is one of the only houses (open to the public) that has been changed very little since it was owned by the family that purchased it back in 1832–before the days of Landmark Preservation Commission.  One very interesting thing we learned was that typically houses at that time had basic wood flooring laid down (rather than detailed high-quality wood flooring) because the fashion at that time (and symbol of wealth) was to carpet from wall to wall.  This struck me as funny since everyone fusses about original wood floors in older houses.  Here is a photo of the carpet from the Merchant’s House (it is newish but an exact reproduction of the original).

Merchant House Museum 016

Another interesting tidbit we learned was that the family room, where much of their time was spent, (not to be confused with the formal parlor room, which was for entertaining) was located on the garden level next to the kitchen.

Anyway, back to our reality:  One of the very first things we did after closing on the house was to go over and rip up the linoleum to see what was underneath. The back of the parlor floor (which will be the kitchen) had the best floors in the house with only one thin layer of linoleum.
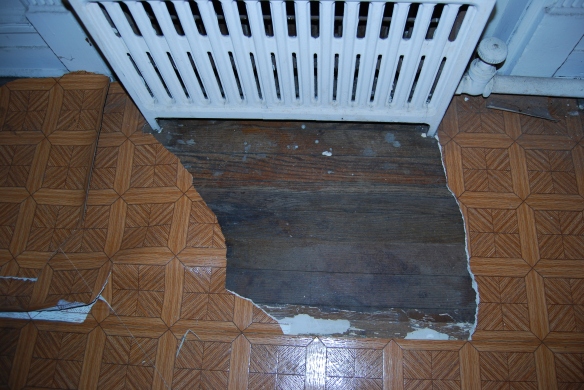
parlor floor back

The rest of the parlor floor had mostly been stripped when we looked at the house but still had layers of a black paper-like substance that was used as an adhesive (luckily not asbestos – it was tested).

parlor facing south

Our contractor had some major concerns about how difficult it would be to remove and what the floors would look like after.  So we priced out new flooring and decided that we liked the old weathered look after all!  Actually, we do like the look of older flooring and we were a little disappointed that there was not wide planks–but you get what you get.  We were told the floors were pine sub-flooring in the front and oak finished flooring in the back (second photo above). When we researched pine, the pictures we saw were finished in a light golden color when stripped down to its natural color as in the photo below.

pine floors

Our contractor did a test patch to see how it would look sanded.  We were happy with the condition of the floor although we still have to decide if we want to put a filler in the cracks.  It was unexpected that the floors were so amber/cherry colored (there is no stain on it here).  We are not a big fan of red coloring in floors.  After a little research we learned that gloss oil-based polyurethane, like that used by the contractor, actually adds a slight amber color to the floors.

floor sample

We did a little more research and found out that water-based finishes do not add an amber color to wood and are less likely to darken or turn yellow over time.   We intend to use a product called Bona Traffic (or a similar brand like Basic Coatings) that is a water-based polyurethane finish in a matt or satin finish.  Other benefits include the fact that it typically has half as much VOC (Volatile Organic Compounds) content than the traditional oil-based polyurethane finishes, it dries faster and is easier to clean when mistakes happen.   Some sources say it is not as durable and point out that it requires 2 or 3 coatings (which negates the fact that it dries faster I guess).  We like the pros more than we are concerned about the cons.  Since this product is more expensive, make sure you note its use in your original bid for contract–or else your contractor may charge you extra.

Peeling Back Time

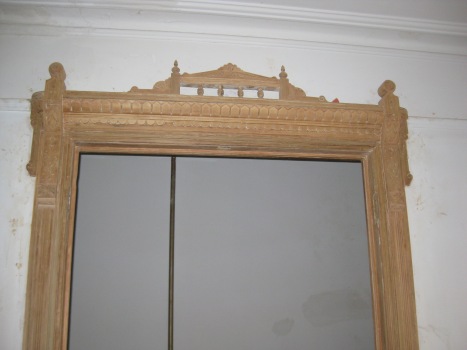
Every time we remove something not original to the house, it feels like the house is breathing a happy sigh.  During times when the contractor has been in a holding pattern, waiting for materials or for changes in the weather, the crew has started to strip the paint from some of the moldings and doors.  When we first looked at the house, the moldings over the doors seemed a bit cheesy and over-elaborate as our taste tends toward simple and classic.  Over time they have grown on us and seeing them without a hundred years of paint has really added to their attraction because  you can now see the detail of the design.

223 Prospect Park 091

The question is now: to paint or not to paint?  It seems a shame to cover all that wood with more paint but at the same time we’ve never been a fan of exposed wood molding.  The vision we (or I) had for the parlor floor is light and white.  The other consideration is whether they are in good enough shape to stain or has stripping many years of bad paint jobs and door repairs damaged the wood so that staining would merely bring out more flaws.

017

House 005

018

It is always a great feeling (because there are so few in renovation) when something turns out better than you thought.  The crew stripped the old door handles, hinges and doorplates and we love how they turned out.

IMG_2582

When they are all done we will do a test patch to see how they look stained and then decide.  Hopefully, by then, the extension will nearly be complete and we will get a sense of how the light is going to hit all the rooms.

Restoring Old Fireplaces

WE ARE AMAZON ASSOCIATES

– we get money when visitors purchase something from one of our links to Amazon. But we do not link to any products that we don’t recommend!

When we were looking at houses, one of our must-haves were at least one working fireplace.  When my husband and I first met, I had an apartment with a working fireplace and it was so cozy and romantic.  But behind the romance there is a lot you have to know to get a working fireplace

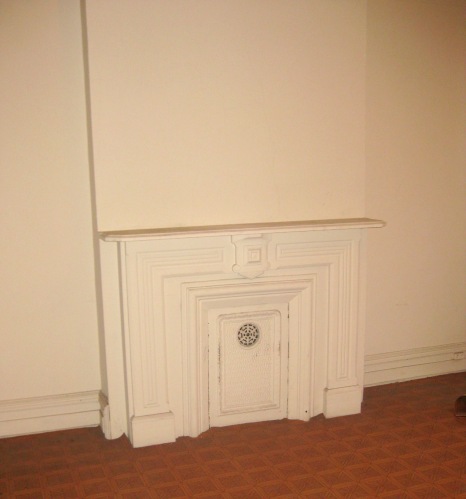
Parlor floor mantle

First, most realtors will tell you that if there is a fireplace mantle in the house that “you can get it going” with a little restoration but what they don’t tell you is the cost.   At one point in time our house had six working fireplaces.  We know this because there are six separate chimney flues.  Even though you see only two chimneys on the roof, each of those chimneys house three separate flues.

In the third floor rental unit the mantles were removed and the hearths were dry walled over.  On the garden floor there is one marble mantle (still painted over) and one brick hearth (both closed up).

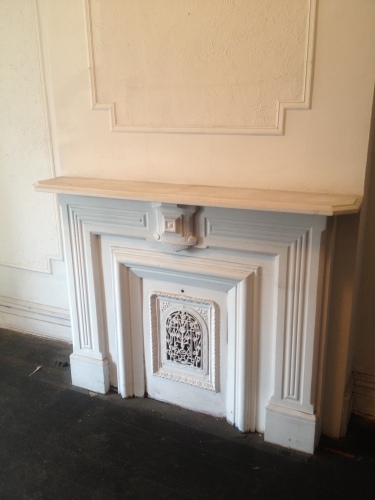
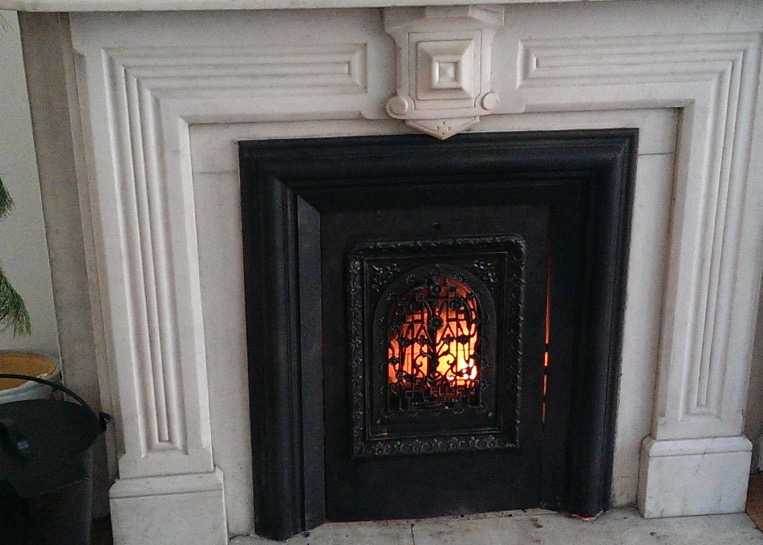
On the parlor floor there are two marble mantles with metal summer doors (see above).  After our offer on the house was accepted, we looked at the house more closely during the inspection.  In one of the fireplaces, part of the summer door was removable and we saw that there was no bottom.  We asked some contractors and architects for possible explanations and they thought that the house had never had wood burning fireplaces and that there was coal burning heat in the basement and that these were essentially decorative openings to let the heat in.  Turns out they were wrong.  Yes, these were actually once wood burning fireplaces.  We finally got the summer door off of the other mantle and there was a brick bottom on it that clearly had been used to burn wood. This opening (or firebox) was also much deeper than the other one and it is an unsolved mystery why they are different.

The Anatomy of a Fireplace

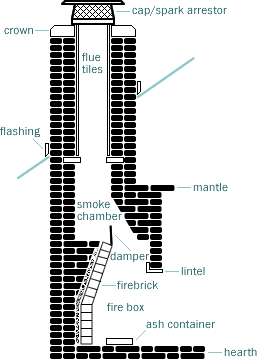
chimney-diagramA fireplace and chimney is made up of several parts including the mantel, the hearth, the firebox and the smoke chamber.  Over the years these components can get damaged, wear out or no longer fall within modern code requirements.
The Cost

When we first priced fireplace restoration, we researched the average cost in our area for this type of work.  In New York City, the prices varied from five to seven thousand dollars per fireplace.  That does not necessarily include all the extras.  Do the chimneys need refurbishing?  Do you need a new boiler flue liner?    If the house has not been updated in a while, you probably will.  That will run you about an extra three thousand.  Do they need to rebuild or enlarge the hearth to make sure it is up to code?  –an extra thousand there.  If the hearth opening is too narrow, they may need to remove the mantle so it can be enlarged.  That will cost you, in addition to the fact that with a marble mantle it may CRACK when removed.  There is nothing they can do to prevent it and the cost of replacement is on you.  Finally, there is the smoke test which must be performed by a third party company, and as with all construction related inspections, it is not cheap.

VERY VERY IMPORTANT

IMG_2679A certain amount of fireplace restoration can be done without a permit from the DOB.  However, if you are in the process of doing a renovation then it must be done under the general construction permit.  This means that it must go under your contractor’s insurance and therefore your contractor will “manage it” i.e. tack on a 20% fee.
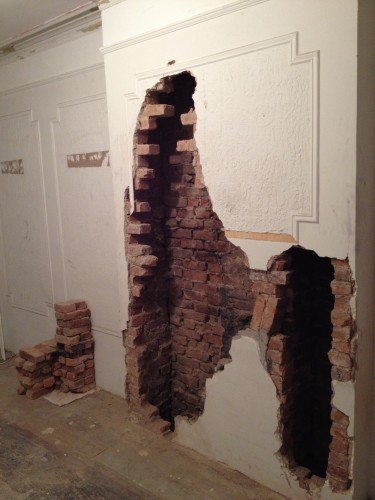
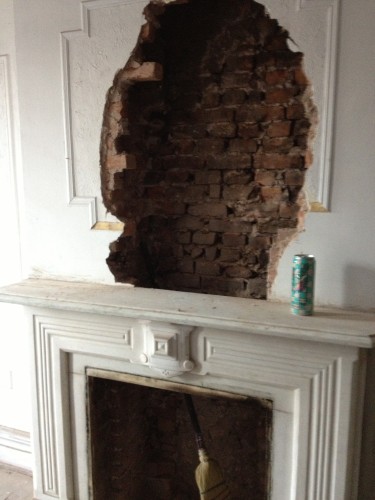
And then there is the mess.  When we first contemplated our renovations we though we would put off the fireplaces because they weren’t an absolute necessity and we knew they were expensive. Afterwards, we thought we should get some estimates to verify how much it would cost.  We acquired three estimates and they were roughly the same price.  In addition to cost, we learned the physical requirements of the project.

Ouch - glad we did not paint up here.

Ouch – glad we did not paint up here.

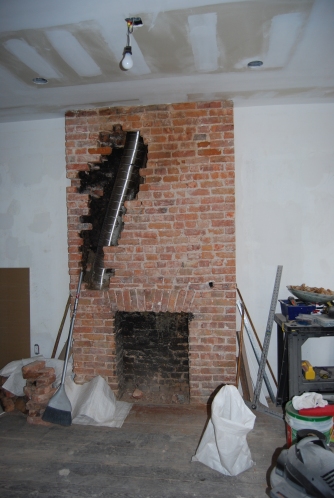
When chimney liners are replaced with modern flexible steel liners they need to open the walls above the mantle as well as on any floors above.  While they do put plastic around their work, mess is inevitable.  We realized how crazy it would be to finish the other renovations and then reopen walls after they had recently been re-plastered and painted not to mention the damage that may be done to the floors as well.

Best Old-house Advice You Will Ever Get

Do the fireplace restoration before you start anything!  Once you have filed with the DOB for construction permits, then you must put the fireplace restoration under that permit.  Our house sat there for over a month while we waited for a Letter of No Objection that never came and then waited another month for the preparation of filing drawings and paperwork.  We might have saved ourselves filing fees and mark-up fees, not to mention the fact that something on the house would have been progressing, by starting right after closing.  By not restoring the fireplaces first thing, it also stalled the work in the rental unit. We didn’t want our new floors to be scratched up by the sand in the mortar which gets all over the floor and is ground in by the construction workers’ boots as they walk around.

Cost and mess aside, we were very happy we decided to refurbish the fireplaces.  They look great and will increase the value of the home in the end (we hope).  We look forward to future delightful snowy nights with no place to go.

To keep our metal summer doors looking fresh, we periodically used a black metal polish.  We used a brand called Meeco’s Stove Polish.

fireplace

Progression

fireplace upstairs

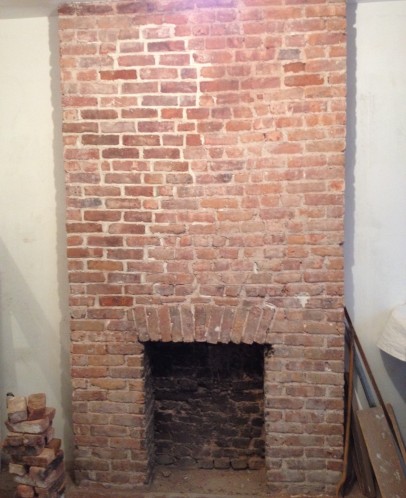
Fireplace as we found it covered with several years of paint

They framed to mantle to prevent damage.

This is the chimney in the rental unit that had to be opened up.

This is the chimney in the rental unit that had to be opened up.

photo (17)

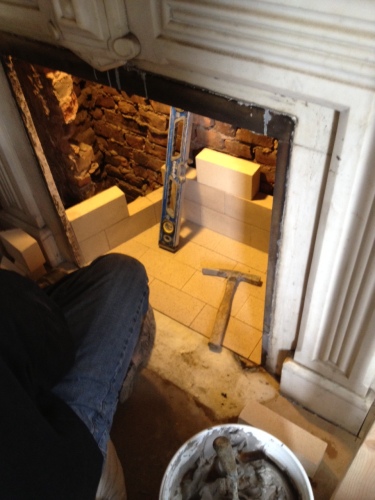
Installing the new firebox.

photo (16)

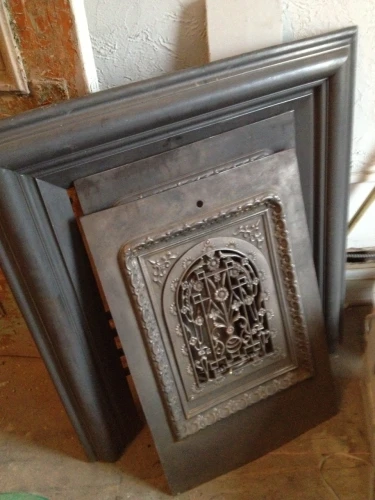
Frame and summer door stripped down to original metal.

Frame and summer door stripped down to original metal.

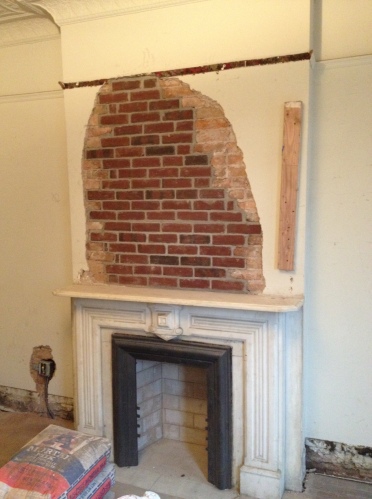
The wall will be re-plastered later by our contractor.

The wall will be re-plastered later by our contractor.