The Renovation Kitchen Blues

This weekend we went to the house as we do every weekend to check out the work that was completed in the previous week.

The plumber finally came this week after many false promises.  We were so excited to see that the plumbing for the small bathroom, the pot filler and the backyard hose faucet was complete.

We are just waiting for the back windows and doors from Marvin, which are due to arrive this Friday.  They have completed closing up most of the kitchen walls and it is really coming together.

kitchen interior

Then we went to the third floor.  A while back, if you recall, there was a new structural plan created because our party walls are only a couple of bricks thick.  The new plan called for a steel channel to stretch the width of the room.  To install this they had to cut into the ceiling (thank goodness we did not install the new floors up on the third floor as planned).

While we were up there we noticed the radiators in the middle of the floor and we were thinking that we needed to put them back only to realize that during demolition they removed all the pipes that serviced these radiators during demolition but did not restore them and, as far as we know, did not have a plan to restore them based on the fact that they closed up most of the kitchen walls.

View from the kitchen extension on the parlor floor up to the third floor.

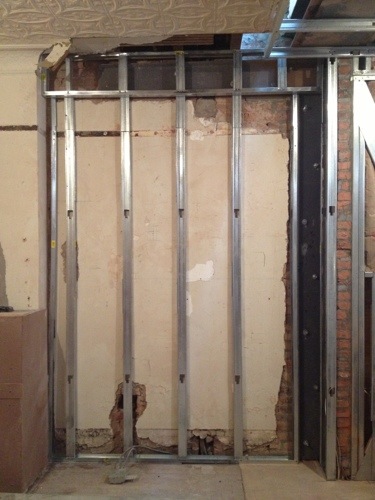
View from the kitchen extension on the parlor floor up to the third floor. No pipes!

Lesson 157, make sure your contractor has a plumbing plan that you have reviewed and approved so you know where all the plumbing is going to be located or relocated.  We are pretty sure our contractor totally forgot about this but we will see what he says.  In the end, all that great progress in the kitchen will probably need to be cut into or removed.  We also figure we are going to end up with an exposed heating pipe somewhere that we had not anticipated in our design plan.  Just another day in paradise.

The engineer signs off

This week we crossed a major milestone: the structural engineer’s signoff. After the structural steel was installed a few week back to hold the 3rd floor masonry wall our engineer was still concerned that the channels required additional reinforcement. He requested columns be installed directly below the masonry wall and welded to the installed framing.

left-kitchen-wall-precolumn.jpg

Left kitchen wall before the column reinforcement was installed.

It has taken a few weeks to order and install the steel but it’s finally done and the engineer has signed off.

Left kitchen wall with the column installed.

Left kitchen wall with the reinforcing column installed.

This is a huge relief and now we can move forward with the work this has held up such as framing and drywalling over these channels.

Left kitchen wall with light gage framing for drywall.

Left kitchen wall with light gage framing for drywall.

It also means we can begin to seal up the building with roofing materials and a number of other products our architect recommened. To be completely honest, when it comes to this exterior water proofing stuff we are completely in their hands.

Next up is door, flooring and molding research and selection.

Tiling bathrooms – what to know before your contractor tiles

Throughout our renovation we have done most of our research and shopping online,  however, tiles are the one thing where a bricks and mortar store is where you want to go.

When initially planning out our bathrooms we considered what tiles to use.  We still had a box of tiles left from our former condo renovation.  We were happy with those tiles so why not use them again?  Nothing is ever that easy.  We tried to contact the previous tile store we used but, alas, they were out of business.  We looked online and did find the tiles but could not find any in stock. In fact many online tile retailers represented tiles on their website that they did not actually have in stock.

Tiles in our old bathroom - they were Italian and discontinued

Tiles in our old bathroom – we loved them.  They were Italian and discontinued.

We did some research and found a few tiles places that we checked out.  Classic Tile, located in Brooklyn and Staten Island (the SI store is open on Sundays) has a large showroom and a good selection.  Unfortunately, all the tiles we chose there were discontinued, which we were not able to find out until Monday when the store could call the distributor.  We also could not find them in stock online anywhere else.  Next, we went to Mondial Tiles, a family-run business located in Bensonhurst, Brooklyn.  They have a good selection of tiles and are also counter top fabricators.  The owner, Alex De Meo, was very helpful with putting together a selection of tiles that worked.

How To Plan Out Tiles

The number one rule in renovation:  don’t assume the contractor knows what you want or will make the same choices. You want to be as specific as you possibly can.

When our contractor was ready to tile, we knew we had to make it clear what tiles we wanted where.  Although we did not choose an overly complicated tiling design it still needed some explaining so we drafted a rudimentary illustration.  We also numbered all of the materials on the drawings as well as with tape so they would know, for example, what grout needed to be used with what tiles.  We were totally prepared, right?  Wrong.

When our contractor installed the cement board around our bath, an unplanned alcove was created beside the tub.  We liked the utilization of this previously wasted space but it had not been factored into our tile order.

alcove on the right

alcove on the right

Picking out tiles and the correct square footage is not enough,  you need to make sure you plan exactly how many tiles you will need both vertically and horizontally along each wall accounting for grout lines as well.  Rarely will the tiles line up exactly with the wall dimensions so they will need to be cut somewhere.  These plans should also account for plumbing fixtures, shelving and any other details that you want your tiles to line up with.

What you need to decide is where you want the cut tiles placed.  If you don’t the tile guy is going to make that decision and you may not be happy with the results.  Sadly, we learned this the hard way and on one wall we had about one inch of space left over and did not like the way the tiler solved the issue.  A further disappointment was that the grout line was slightly crooked.  We haven’t figured out how to fix it other than getting them to straighten the line.

Tile line

There is one other spot where the grout lines do not match up (see below), can you find it?

master bath tile

Overall, we are pleased with our master bath tile choices–once we have figured out what to do with the angry inch.  For now, we (me) will just have to dream about baths in the new longer tub with the built-in shelf where all the shampoo bottles will not be falling off the side of the tub.