Some Finishing Touches on the Kitchen: backsplash, under-cabinet lighting, pot filler.

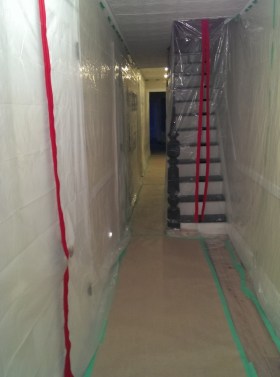
While waiting for the contractor to come back and finish (two months now) the deck off of the kitchen, we forged ahead to finish some smaller details that were not part of our original contract.

We hired a contractor to do a basic subway tile pattern back splash.  Why it was not in our original contract is yet another one of those details that got lost in the shuffle.  No loss because we were very unhappy with our contractor’s tile work in two bathrooms so we were more than willing to find someone else.  We don’t have many tips that result from this job other than the recommendation to use quality subway tiles.  Our tiler advised us to get Daltile or a comparable notched tile because they produce a nice thin grout line.  This is achieved with notched tiles because they are installed one right up against the other and the notch leaves space for the grout so you get even grout lines throughout.

backsplash

Under-cabinet Lighting and Outlets

For our outlets we decided to use Legrand’s under cabinet lighting system.   This system is a bar that runs under the length of the upper cabinets and allow you to add or remove outlets whenever you want and offers other accessories like an iPad cradle, speakers, and under-mount cabinet lights.  This company also has really nice pop-out outlets that we were going to use on the island but in the end we did not use them because they did not fit in the space we needed them.

We liked this system because we weren’t tied to a specific place for outlets, we did not have to plan the tiles around the outlets and it looks cool.  The drawbacks are that it is not cheap and you can see the wires for your appliances.  This will give us the motivation to only plug things in when we need them.  We plan on adding a trim piece along the bottom of the cabinets to hide the lights.

undermount lights

Pot-Filler

Not much exciting to report here other than the fact that it is in.  Since we did not know when the plumber would be back we installed it ourselves.  Now we just have to make a lot of big pots of pasta or boil a lobster to make the expense of this item worth it.

pot filler

Patio Dig

Midway (of which I have no recollection) through our project we were told that we would need to have our back patio area dug down to meet the new back foundation of the house.  Why this wasn’t discovered before we sent our project out to bid and before our budget was determined is one of the many mysteries of the renovation bidding process.  At a time when you are overwhelmed with details someone might say, ”hey, you will probably need to dig down here” but it gets lost in all the other minutiae that you are trying to decide.  So thousands of dollars that we don’t really have later, we hired Design Tech (who did our front windows) since we did not feel inclined to use our contractor.

Preparation

In order to lay the concrete slightly sloping away from our building they needed to dig down about 4-6 inches.  You don’t want your patio to be level or slope towards the building because in heavy rain or snow moisture will get in.  Since there is no access to our backyard it meant having to remove bags of dirt by going through the house.  Sigh.  We felt a little better when we saw that they covered the floors and walls in plastic.  We had to vacate our bedroom and move our bed, clothing and toiletries that we would need into the living room.  The projected duration was estimated at two weeks.  Our original contractor informed us they would not be back until it was done (mainly because I think they were ticked off that we did not hire them for it).  We didn’t need any more commotion in the house anyway.

plastic

Considerations

One of the problems with pouring concrete is getting the color even throughout the entire slab. We couldn’t get a mixer through the house or a pump truck so we chose blue stone tiles set in concrete, and anyway the tiles looked nicer.  This stone is fairly expensive but it is good quality and we wanted to do the patio once and not have to worry about it.

Before doing this type of work you may want consider your plan for the backyard and any potential fencing.  Now is the time to put in fence posts because you can set them permanently in the concrete making your life easier later when you install a new fence.  We knew that ultimately we wanted a wooden fence so we chose to install 6 basic 10′ long pressure treated posts and then later we could decide what style and height we wanted it to be.

You will also need to consider drainage. We selected a trench drain which runs nearly the length of our patio and ties into our building’s waste line.

Process

There were four stages to the project:  digging out and removing the dirt, tying in the drain, pouring the concrete and then laying the blue stone tiles and grouting.  Here is the pictorial progression:

Before

Before

before

before

removing existing slab

removing existing slab

mid-dig

mid-dig

drain installation

trench drain installation

laying down blue stone

laying down blue stone

patio finished

Finished!

Afterwards

The project ended up taking almost three weeks to complete because of some minor issues but we are happy with the results.  Because we had to dig down, the rest of the yard is now 6 inches higher than the patio so my wonderful husband started work on a timber retaining wall so the dirt wouldn’t seep onto the patio and clog the drain.