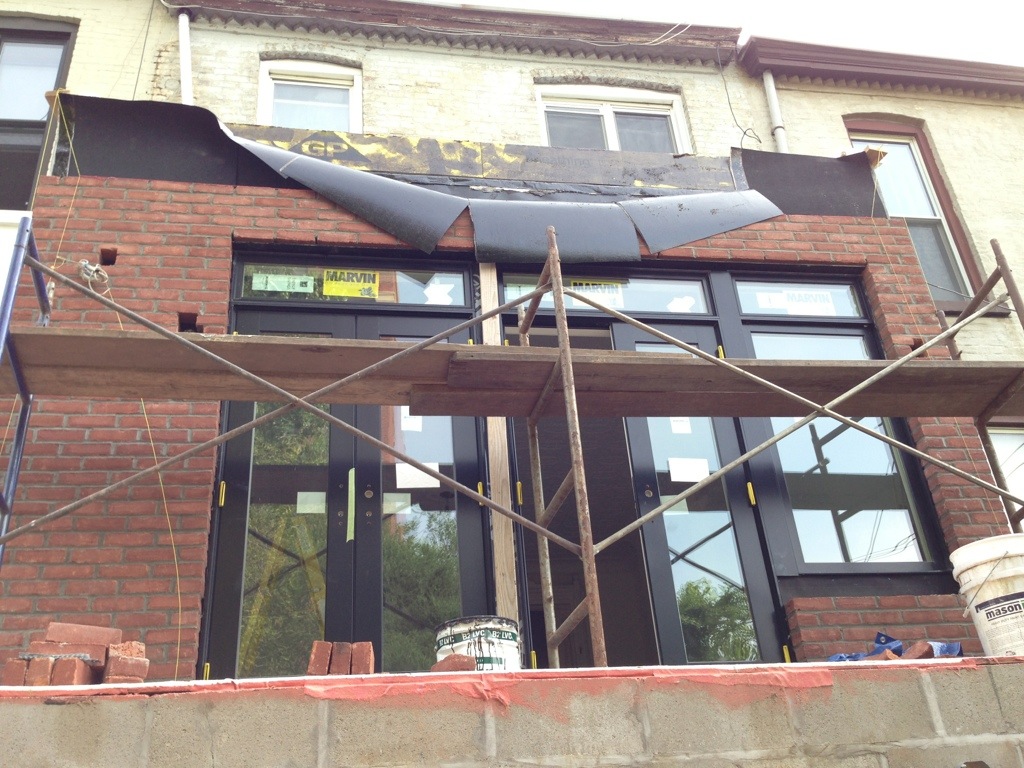
Partially due to weather and partially due to working through structural details we’ve had a number of starts and stops with our extension over the past 2 months. In November, I posted about the pouring of the extension’s concrete foundation walls. These were completed in December and we have built up CMU block walls for the 1st floor and poured the cement slab for the floor of our future master bedroom.

While most of this was complete in December we ran into unexpected delays with the structural work that was only resolved this week. Our extension requires the removal of the rear brick wall on the first and second floors of the building. This is a lot of brick, one large container full, and some civil engineering was required to safely support the remaining 12,000 lbs of brick in the 3rd floor wall.
The original plan was to use 16 foot steel channels anchored to the rear wall and supported by the brick in the party walls shared with our neighbors. Unfortunately, after opening up the walls in December we discovered they are only 2 bricks wide instead of the assumed 6. Two bricks are not enough to support the wall so back to the drawing board we went and after a few rounds with our civil engineer we have a new solution.
The solution involves 2 long steel channels anchored into the brick of both party walls and 2 channels running the width of our building on either side of the 3rd floor brick wall with large bolts running through the wall to anchor it. It was quite an install process involving welders, epoxy pins and large drills but it’s done and we have happily moved forward with framing out the extension and installing the subfloors for our kitchen extension and terraces.

Here is the right party wall channel and the 2 rear wall channels. Note the metal plate welded to the underside of the channels to provide additional support for the brick wall.

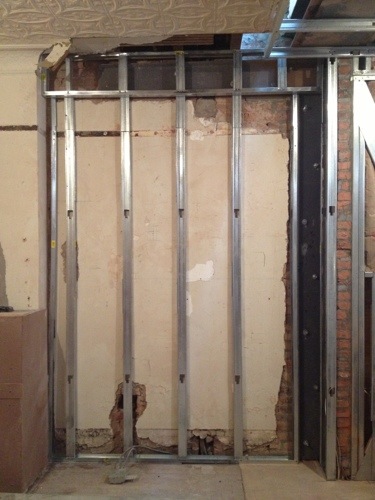
Here is the kitchen before the final channels were installed. In the background you can see the framing of our kitchen’s future door and window openings. In the foreground there are jacks and temporary beams in place to support the brick wall while the channels are installed.

Here is what the room looked like when we first purchased the house. Seems like that was over a year ago. Oh wait… it was over a year ago.

Thanks to iOS 6 and the panoramic photo feature here is the left and right channels as well as the ones attached to the 3rd floor rear wall. We were able to keep most of the ceiling shown in the before photo.
This was by far the most exhausting and challenging part of our project and has held up the progress for about 6 weeks. If you’re ever planning a similar project be sure to double check the party wall size. Had we done this last summer when planning the project we would probably be moving in now.